Home Artist Information Wildlife Sculptures Selected Commissions -- HMS Victory - Enquires /Sales
Creating a Sculpture - Creating a Relief Carving - Creating a Bronze Creating a Mould Creating a Crest / Arms
Creating one and two-piece silicon rubber moulds
To make a moulds from the original master copy of a sculpture which can then be used to accurately reproduce replicas of an original sculpture is usually undertaken at the art foundry, however briefly outlined here is an example of how a one and two piece mould was made which would enable wax replicas of the original sculptures to be reproduced.
Silicon rubbers which was used in these two examples can be effective for a variety of mould making requirements and by using a variety of combinations of silicon rubbers, catalysts and additives enable a wide range of strengths, viscosities and properties to be obtained. Room vulcanising i.e. cold cure rubbers can produce moulds with working temperatures of between -50° C to + 250° C to cast various materials including wax, cement, plaster, polyesters and epoxies. The silicon rubber used in this example was a cold cure, very high strength grey rubber and proved very effective in replicating all the fine detail required..
As way of an example two completely different style of sculpture were to be the subject, although they had a number of undercuts which can sometimes prove to be problematic, it was still possible to make a rubber and plaster mould without damage to the original master copy and also the wax replicas themselves once they were cast and removed from the mould.
The main materials required to produce this particular mould was a high strength moulding plaster, which is required to retain the flexible silicon rubber mould itself in the correct position. The two part cold cure silicon rubber, when necessary some 'Thixo' agent which thickens the rubber when added to the rubber mixture, a small box with removable sides to contain the plaster as it was being poured. Scales or some other suitable means to accurately measure the correct mixture of the two parts of silicon rubber. A supply of soft clay which was used amongst other things as a 'bed' for the sculpture master copy to be placed upon, and 'soft moulding soap' or a 'spray on mould release agent', which helped prevent the two separate sections of plaster and silicon rubber sticking to each other and also the master copy itself when the various casting materials i.e. wax, plaster etc, were being poured.
|
|
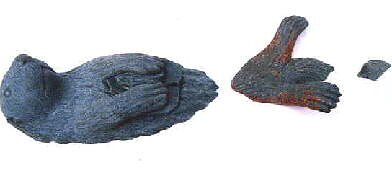 |
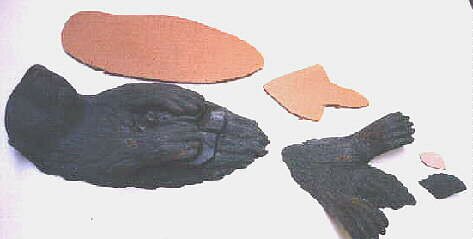
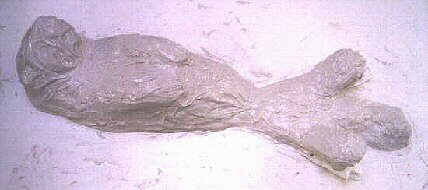
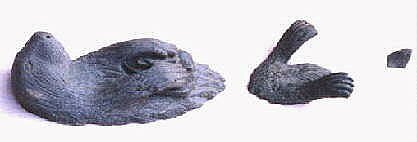
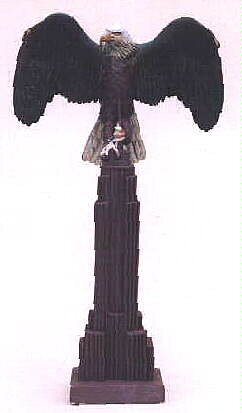
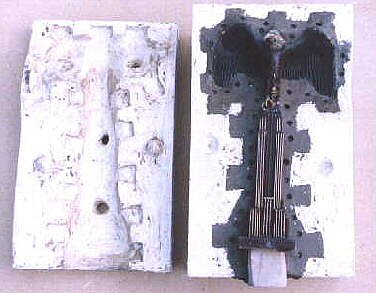
The original sea otter and bald eagle sculptures use to produce silicon rubber moulds
One piece Silicon rubber mould :-
 |
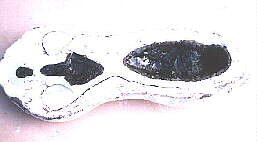
The original sea otter sculpture produced by Ian was used in this example in making a one piece mould. Thin shims of waxed cardboard were used to keep the original sculpture slightly raised above the surface of the base to enabled the silicon rubber to flow underneath the wax original a few centimeters.
 |
 |
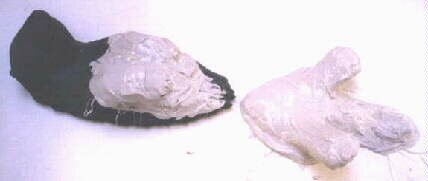
Before the catalyst which cures the silicon rubber was added, the rubber was firstly mixed with a Thixo type additive which thicken the rubber, when the catalyst was then been added to the mixture it can be applied to the sculpture with a brush or spatula .Once the whole sculpture has been covered with this rubber mix to the desired thickness on this occasion to a depth of around 3 mm, it is left overnight to cure.
 |
 |
 |
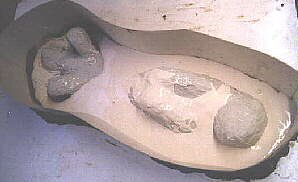
The now cured silicon rubber covered sculpture was then surrounded with a sheet of cardboard embedded in a soft clay which helps to contain the moulding plaster which could then be slowly poured over the rubber mould.
 |
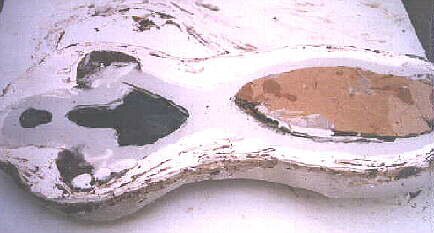 |
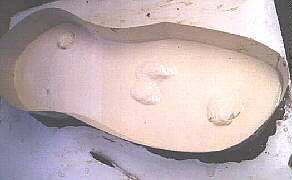
Once the plaster has virtually set the cardboard wall was carefully removed and the still slightly warm moulding plaster trimmed to the desired shape. The plaster once it has set hard was turned over and the waxed cardboard shims removed, the original sea otter sculpture could then be taken from the rubber mould.
The rubber mould was then held up to the light to check for any holes or potentially thin sections in the rubber, any such imperfections can be usually be corrected at this stage by making up a small mixture of the same silicon rubber and thixo mixture and then add it to any thin or damaged sections as this silicon rubber mixture will usually successfully stick to each other to form an adequate seal.
 |
 |
The silicon rubber mould was then cleaned with warm soapy water and allowed to dry. To produce the first wax castings hot wax was carefully dripped into the rubber mould and swilled around the mould until the desired thickness was obtained, this wax would eventually be replaced using the loss wax process by bronze.
Creating a two-piece silicon rubber mould
To make a multi piece mould from the original master copy of a sculpture without damaging the master copy, which can then be used to successfully reproduce many accurate replicas of the original sculpture in a variety of materials is a highly skilled process usually undertaken at the art foundry. However briefly outlined here is one example of how a simple two piece mould was produced and then used to cast wax replicas.
Silicon rubbers which has been used in this example can be effective for most mould making requirements. By using a variety of combinations of silicon rubbers, catalysts and additives which enables a wide range of strengths, viscosities and properties. Room vulcanising i.e. cold cure rubbers can produce moulds with working temperatures of between -50° C to + 250° C to cast various casting materials, which include wax, cement, plaster, polyesters and epoxies. The silicon rubber used in this example was a cold cure very high strength grey rubber and proved very effective in replicating all the fine detail.
On this occasion one of Ian's smaller sculptures, a bald eagle was to be the subject, although the sculpture has a number of undercuts which can sometimes prove to be problematic, it was fortunately however possible to make a mould without damage to the original master copy and the wax replicas themselves when they were cast, also they did not requiring to much detailed work to finish them after they were removed from the mould.
The main materials required to produce this particular mould was a high strength moulding plaster, which is required to retain the flexible silicon rubber in position. The two part cold cure silicon rubber. A small box with removable sides to contain the plaster as it was being poured. Scales or a suitable measurement container which will accurately measure the correct mixture of the two parts of silicon rubber. A supply of soft clay which was used amongst other things as a 'bed' for the sculpture master copy to be placed upon, and 'soft moulding soap' or a 'spray on mould release agent', which helped prevent the two separate sections of plaster and silicon rubber sticking to each other and the master copy when the various materials were being poured.
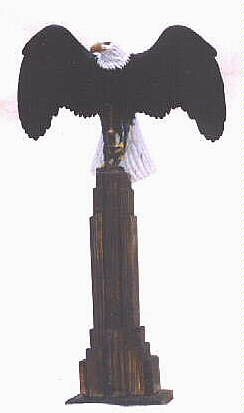 |
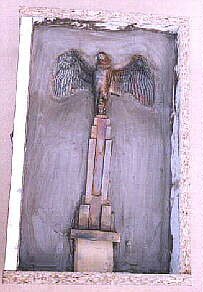
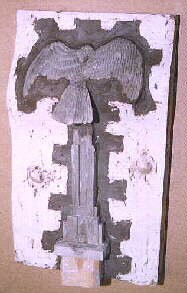
The original 12 inches high woodcarving
The master copy of the Bald eagle was originally carved from lime wood and then the sculpture was bleached and stained before the surface of the wood was sealed with a wood sealant to help prevent the rubber mould making material sticking to the all fine detail.
The making of this 'negative' within the mould began once the most suitable joint-lines on the original sculpture has been decided upon, this would enabled the sculpture to be removed from the mould, without minimal damaging to the original woodcarving, the rubber part of the mould or indeed the wax replica themselves, once cast and being removed from within the mould.
 |
A very thin coat casting soap was applied to the whole surface of the original wood sculpture which will help prevent the rubber sticking to the woodcarving, sometimes a thin coat of wax can also be used. A thin plastic sheeting was used to cover over the whole sculpture which helped prevent the soft clay when it was laid on to the sculpture clogging the fine detail on the master copy which has to be cleaned of before the rubber can be poured..
 |
 |
A thin layer of soft clay was rolled out over the whole sculpture, this layer of clay will determine the eventual thickness of the rubber as this clay will eventually be replaced by the silicon rubber. Small clay 'keys' are made and placed around the edge of the sculpture to enable the rubber mould to be securely seated within its plaster jacket. Raised sections made from rolled clay are placed upon the sculpture not only to act as funnels and breather holes which will be used not only to pour the liquid rubber into, but will also help to secure the rubber in position within its plaster cast 'jacket.'
 |
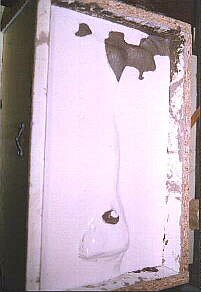 |
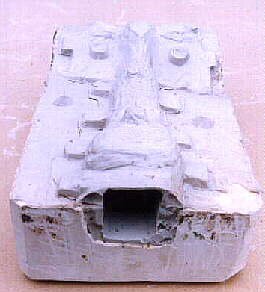
A mixture of moulding plaster was then prepared and slowly poured over the whole sculpture to minimise air bubbles until it was completely covered to make the 'mother-mould'. Once the plaster has set usually within 30 minutes the whole box was then turned over and one of the sides of the box is removed . Two shallow holes were placed into the inside of the plaster jacket on either side of the mould, which enabled the plaster jacket to be accurately match when they were placed together.
 |
 |
 |
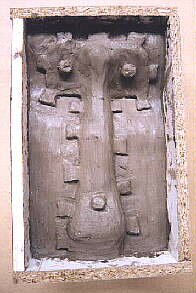
The thickness of the clay, later to be replaced by silicon rubber can be seen here
The clay that once formed the bed for the master copy to lay upon, can now be removed and the back of the eagle sculpture is again covered with a thin layer of clay to the desired thickness along with the clay keys and poring funnels. Two small indentations to act as 'keys' were made within the clay bed which will later be replaced by the plaster, this will enable the two plaster jackets to key together in the same position each time they are assembled.
|
|
 |
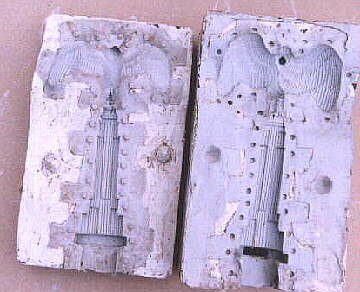
The plaster now almost fully covering the sculpture. The clay having been removed from the left side of the plaster jacket.
The side of the box previously removed is now screwed back into position and once again the mixture of moulding plaster is slowly poured into the box, to again cover the sculpture. Once the plaster has set the side of the box was again removed and the two plaster mother moulds are then carefully separated. The clay from one half of the two plaster jackets was extracted to leave the negative or 'cavern' which the liquid rubber when it is being poured will eventually flow into.
The end of a paint brush was used to make small indentations a little way into the soft clay all around the side of the sculpture, which will form a key to enable each separate halve of the inner silicon rubber mould to be fitted accurately together within the plaster jacket.
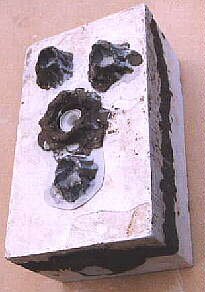 |
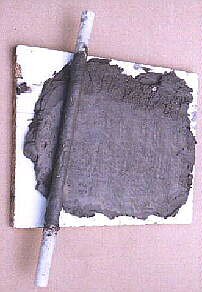
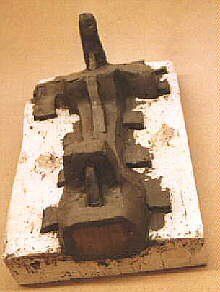
The silicon rubber after being poured into the mould
The sculpture was then carefully cleaned of all debris that might have been left on both the master copy or within the plaster cavity itself, any debris not removed will obviously spoilt the detail of the mould after the rubber was poured over the sculpture. The inside of the plaster jacket was brushed firstly with shellac and once dry covered over with a moulding soap. The master copy itself was then sprayed with a mould release agent which helped to prevent the rubber when poured from sticking to either the sculpture or plaster jacket.
The top 'hollowed' out section of the plaster jacket was then carefully lowered over the sculpture which is still firmly imbedded into the clay bed. The clay closely follows along the edges of the master copy (where the eventual join line of the two piece rubber mould will be). Once the top plaster jacket is lowered over the sculpture all the seams of the plaster jacket were sealed with soft clay to help prevent seepage through this join when the rubber is being poured into the mould. Simple clay funnels are also placed upon the top of the mould which the liquid rubber is poured into.
The two part silicon rubber and catalyst is carefully measured and then mixed together before being slowly poured into the space left by the clay, this mixture is then allowed to cure overnight. At this early stage Ian sometimes allows all the overspill of rubber on the top of the plaster mould to remain in position which will often help keep this part of the mould and sculpture securely in place once the mould has been turned over to repeat the operation on the other half of the mould.
 |
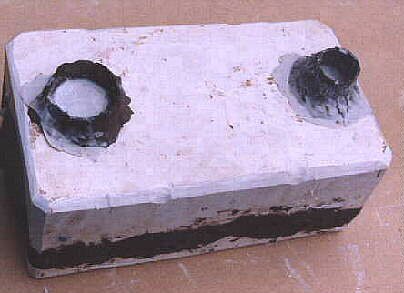
The recently cured grey rubber section of the mould can be seen on the right hand part of the plaster mould, along with the 'pencil' holes for aliening the two parts of the silicon rubbers together. The plaster jacket above on the left, once assembled together is now ready to be filled with the silicon rubber. It is important that the half of the mould containing the cured rubber and the master copy itself is not disturbed in any way at this stage as when the new batch of rubber is poured. Any gaps made down the side of the sculpture and plaster jacket will quickly be filled when the new mixture of rubber is poured which can sometimes cause problems when you try and separate the mould.
 |
 |
Again the two halves of the plaster mould are carefully placed together and the simple clay pouring holes for the silicon rubber are again placed on the top and all the seams along the edge of the plaster jacket are again sealed with soft clay. The sculpture and the inside of the plaster jacket are once again spray with a mould release agent.
A new batch of silicon rubber was measured and the liquid rubber was again poured into the plaster casting into the rubber section of the mould. Once the master copy is totally enveloped with the moulding rubber and has cured overnight, the plaster 'jacket' was removed to expose the completed silicon grey rubber mould.
When mould making once the mould had been opened, on occasions gaps may be found where perhaps the poured rubber has not reached and covered all the original master copy. Providing the surface of the rubber remains clean and the master copy has not been moved from its original position, it is often possible to mix a further patch of rubber and carefully cover over these gaps, as this new mixture of silicon rubber will usually firmly stick to the previously silicon rubber.
Care still has to be taken when the master copy is removed from the now cured rubber, as the master copy although covered with the release agent and the woodcarving has a sealant applied to the wood, the rubber still often will try and stick to the still rather porous wooden master copy. The rubber mould was then cleaned with soapy water and once dry, the rubber was reassembled together and placed within its plaster jacket. The edges of the mould was again sealed with a soft clay, as an extra safety measure help prevent seepages from molten wax when it was eventually poured into the mould.
 |
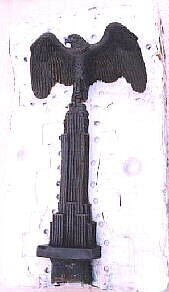 |
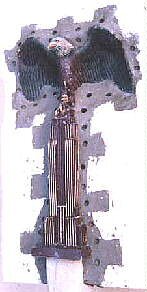
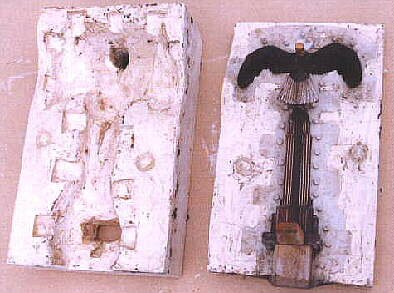
The completed two piece rubber mould and the first wax sample casting.
If the original sculpture tends to have a lot of undercuts which are then to be found in the mould, it sometimes helps to remove the wax replica's when they are still slightly warm as he wax is a little more flexible. The wax casting of the eagle is then ready to be placed upon a 'wax tree' and prepared to be for cast in bronze.
To see the various stages of the process of casting a bronze, please click this link to Creating a Bronze.
Home Artist Information Wildlife Sculptures Selected Commissions -- HMS Victory -
Creating a Sculpture - Creating a Relief Carving - Creating a Bronze Creating a Mould Creating a Coat of Arms