Home Artist Information Wildlife Sculptures Selected Commissions -- HMS Victory - Enquires /Sales
Creating a Sculpture - Creating a Relief Carving - Creating a Bronze Creating a Mould Creating a Crest / Arms
VARIOUS STAGES OF PRODUCING A LIFE SIZE BRONZE SCULPTURE
OF AN OSPREY CATCHING A PIKE
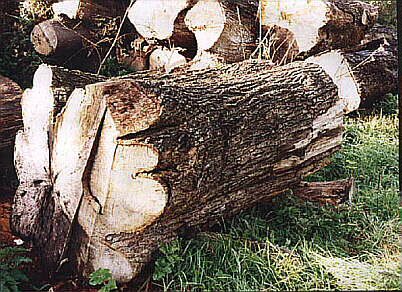 |
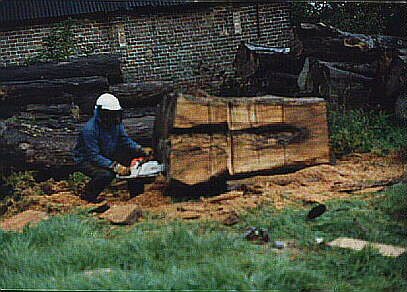
The seasoned Lime tree log used for the Osprey sculpture
105 inches long x 44 inches wide
Possibly the most difficult thing in trying to carve a life size sculpture out of a single piece of wood like this 'Osprey catching a Pike' was tying to find a suitable large tree to carve it from. However this particular problem was soon solved almost overnight in 1987, when Southern England's landscape dramatically change after it was hit by Hurricane force winds which uprooted thousands of such trees. Many of these were mature lime trees which were perfect for a life size one piece sculptures such as this Osprey.
After obtaining and then seasoning one of these Lime wood logs for several years work on the sculpture could begin. Many hours are spent with a large piece of timber such as this, rolling it over trying to work out exactly where the Osprey is hiding inside, also carefully checking every inch of the timber to ensure there are no obvious sighs of rot, worm damage or indeed nails left from some long forgotten washing line, which would not only damage the chain of the chainsaw , but as is often the case leave unsightly dark stains on the finished wood.
 |
(Roughing out the shape with a chainsaw)
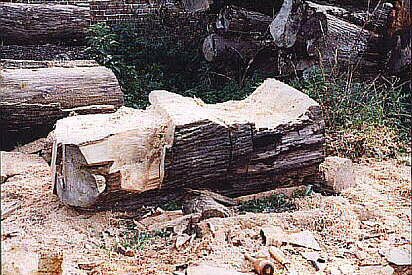 |
When I plan any sculpture I spend a lot of time researching the subject, I not only use live studies whenever possible but also video's and books, until I have built up in my mind a complete picture of what the finished sculpture should look like. It is then simply a case of cutting everything away that doesn't look like an Osprey !!
The first few hours working on any commission is always the most critical and it is very tempting to cut great lumps out of the wood with the chainsaw to try and speed up the process. I try to resist the temptation to strike a particular pose too early which then restricts freedom to change the position of the body, head or feet for example, especially if a flaw in the wood does suddenly appear.
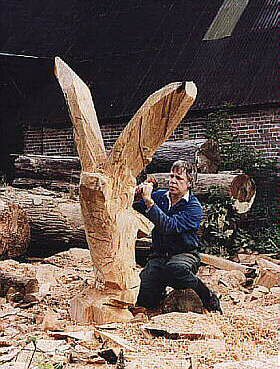 |
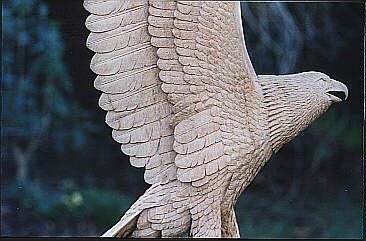
(Using an adze and carving chisels to create the outline of the 'life-size' Osprey, which starts to take shape)
Once the rough outline is complete I am then finally committed to the particular pose the sculpture will take, and the rather repetitive and very time consuming ' feather count ' begins. As there are obviously hundreds of feathers on any bird particularly this 'Osprey in flight', to help prevent the repetition of carving one feather after another, I usually work on another completely different type of commission at the same time. In this instance it was the carved and gilded Coronet for former British Prime Minister Baroness Thatcher carved from a piece of Lime wood I had removed earlier from the same tree used for the Osprey. Once the Coronet was completed it was placed into St George's Chapel, Windsor Castle.
|
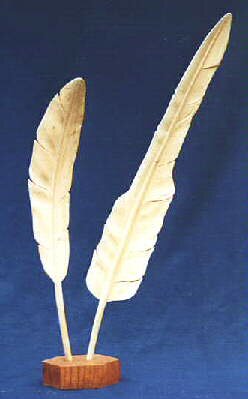
A typical full size Swan and Eagle feather carved from lime wood |

Carved and Gilded Coronet for Baroness Thatcher |
In this instance using a piece of Lime wood I had removed earlier whilst preparing the Osprey I produced the carved and gilded Coronet for former British Prime Minister Baroness Thatcher which was later placed in St George's Chapel, Windsor Castle.
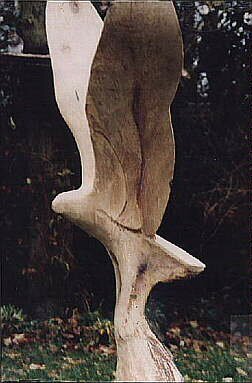 |
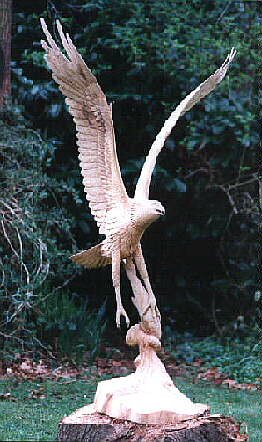
(The rough outline completed)
Once the Osprey sculpture was completed a exact replica was commissioned to be cast in Bronze for a fountain, therefore a flexible rubber mould with a plaster jacket was carefully made from the original sculpture by the Art foundry and a wax replica produced. Unlike the original wooden Osprey sculpture which was made from a single piece and remained that way even during the moulding process, an exact replica was made from the several separate hollow pieces cast in bronze and then welded together.
|
 |
 |
 |
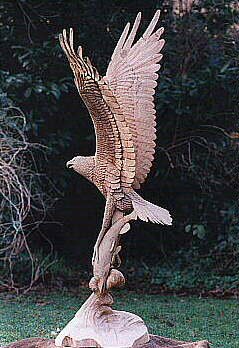
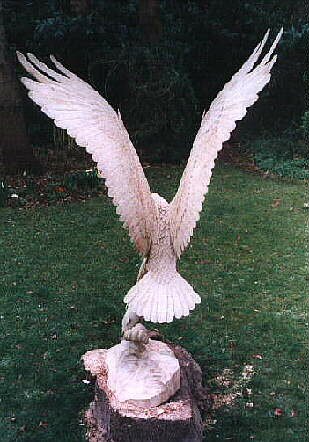
(The completed Osprey wood sculpture before a mould is made)
When the Osprey sculpture was completed an exact replica was then commissioned to be cast in Bronze. A mould of the original sculpture had then to be produced in such a way as to not damage the original Osprey woodcarving. This required a flexible negative rubber mould with a hard plaster 'jacket' to be accurately produced. The making of this 'negative' begins once the most suitable joint-lines on the Osprey 'master copy' has been decided upon which enables the sculpture to be removed from the mould without damaging either the wooden Osprey or the rubber part of the mould itself.
The Osprey was coated with a very thin coat of wax which would help prevent the rubber sticking to the original woodcarving. Each part of the sculpture was then covered with a layer of soft clay, followed by a layer of moulding plaster to make a 'mother-mould'. Each half of this mould is then progressively removed and the clay extracted, the plaster jacket is then put back into position and the liquid rubber pored into the space left by the clay and allowed to cure. Once the master copy is totally enveloped with the moulding rubber, the plaster 'jacket' can again be removed and the flexible rubber slowly and very carefully stripped from the wooden Osprey so as not to damage any of the delicate feathers. Having carved the Osprey from a single piece of wood it was important that the sculpture remained that way, even after the moulding process.
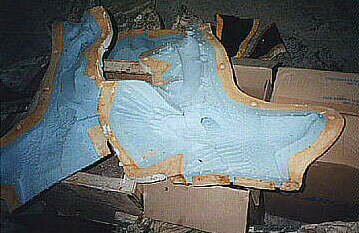 |
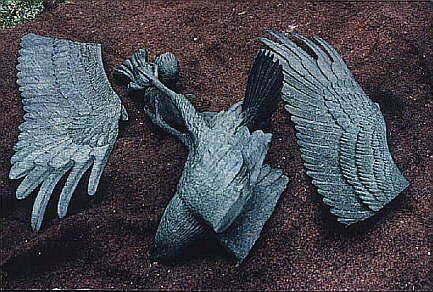
(Part of the completed mould for the Bronze Osprey)
The moulding rubber is then put back into the plaster jacket and hot melted wax is then either painted or swilled against the inner surface of the rubber to the desired thickness required for the finished metal casting. When the wax has cooled the various sections of the hollow wax replica of the sculpture is then removed from the rubber mould. It was then possible for me to inspect and retouch the wax Osprey where required, it could then be signed and the edition number added. The vents and the runner system or 'tree' which channels molten bronze was then applied to the wax.
 |
(The Osprey sculpture reproduced in wax from the mould)
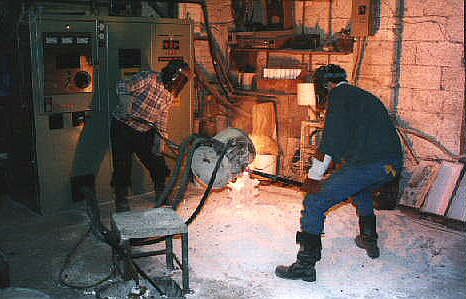 |
(The molten Bronze being pored into the cavity of the pre-heated ceramic mould)
The bronze ingots are then melted in a high-frequency induction furnace and poured into the still warm moulds enabling the bronze to flow into all the detailed sections of the ceramic shell. After the bronze has solidified and the mould has cooled it is broken away from the bronze cast and all the various separate bronze castings are cut away from the tree. Each piece of casting is then carefully welded together using a bronze weld and the remaining runners and vents which were attached to the castings were chassed over to match precisely the original detail which makes it impossible to see the joins in the finished sculpture.
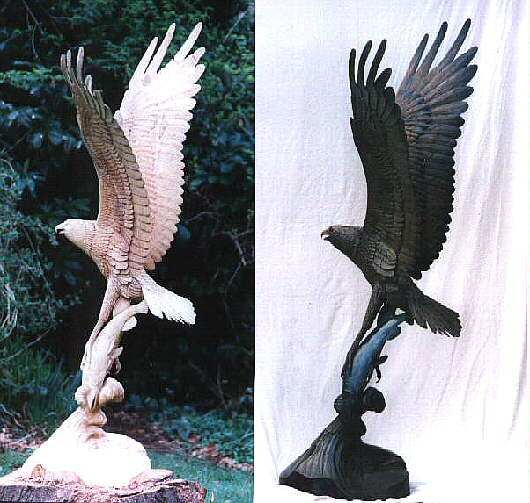 |
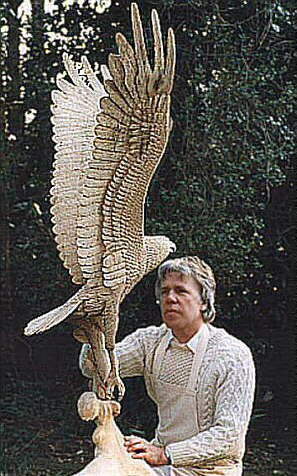
(The wood carving and bronze sculpture completed)
 |
 |
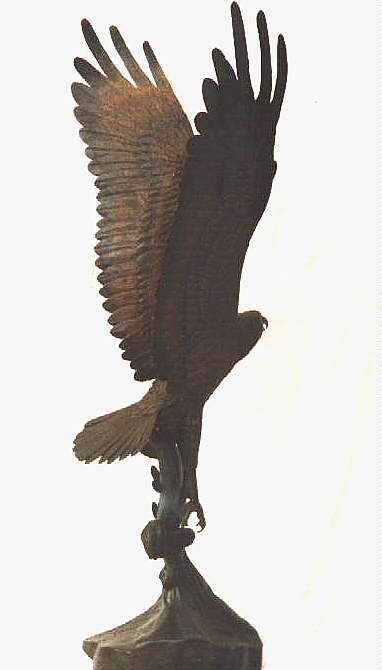 |
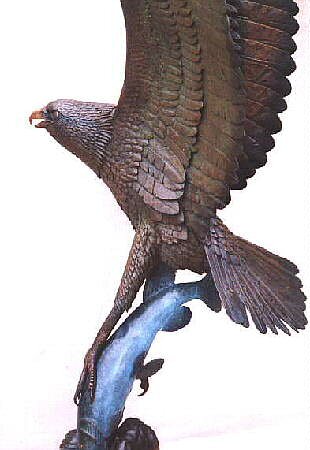
(One of the limited edition of nine bronze 'Osprey Catching a Pike' sculptures)
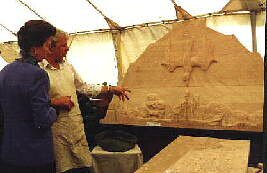
Please click the image below to see the various stages of this bas-relief carving.
|
Ian with his relief woodcarving of the landmarks of the village of Warsash in Hampshire which has recently been completed. HRH the Princess Royal taking an interest in its progress.
Home Artist Information Wildlife Sculptures Selected Commissions -- HMS Victory -
Creating a Sculpture - Creating a Relief Carving - Creating a Bronze Creating a Mould Creating a Coat of Arms